randys blog


Do I Really Need To Buy Another Carrier?
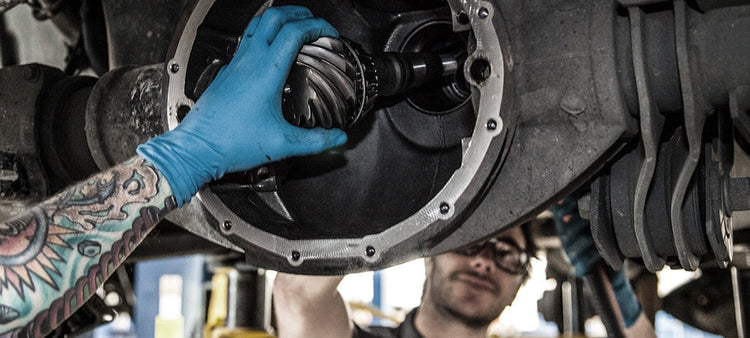
When changing the gear ratio for more power or more speed, sometimes a new ratio requires a different height carrier case. Carrier height changes are commonly referred to as a “carrier break”, although this doesn’t have anything to do with broken parts. What it does refer to is the difference in the ring gear mounting height on the carrier case itself or a breaking point from one height to another. When the gear ratio is changed, it is accomplished by changing the number of the ring gear teeth and / or the pinion gear teeth. The gear ratio is determined by dividing the number of teeth on the ring gear by the number of teeth on the pinion gear. For example, 41 divided by 10, which equals 4.10 for a gear set with 41 ring gear teeth and 10 pinion teeth. As the ratio increases numerically, the ring gear usually stays the same diameter which requires that the pinion gear diameter gets smaller. The smaller pinion gear will not reach the ring gear unless the ring gear is made thicker or the carrier case mounting flange is moved closer to the smaller pinion gear. The ring gear material is very expensive and it is far cheaper (especially when building millions of rear ends for production) to change the position of the carrier flange. Changing the flange height usually requires very little or no extra material on the carrier case. An example of a popular rear end that has a carrier break is the Dana Spicer model 44. The D44 uses two different height carriers. When using ratios that are 3.73 or numerically lower (such as 3.54 or 3.07) a short carrier case is used to allow the large pinion gear to fit in the housing and move the carrier flange far enough away for the ring gear to have thickness left to support teeth. When using ratios that are 3.92 or numerically higher (4.09 all the way to 5.89), a taller carrier case is used to move the ring gear closer to the small pinion, without having to use an excess of expensive ring gear material. In order to avoid the expense of a new carrier case, some people use ring gear spacers. A spacer is a quick fix, but from my experience, not a good idea. If the spacer pushes the ring gear up off of the pilot surface that centers it on the carrier, it will have to rely on the ring gear bolts to hold it centered. The ring gear bolts are neither strong enough or accurate enough to center the ring gear correctly. This in turn causes the ring gear to “walk” around on the carrier and the tooth contact will suffer. Before you know it, the gear set will be noisy, wear out, orbreak. I have seen a very few cases where the ring gear pilot surface on the carrier is large enough that it could still touch the ring gear when using a spacer. This is somewhat better than no contact, but the bolts will still be overloaded and the unit will not last. If your ratio change calls for a different height carrier case,there are a few options that will work just fine. Thick ring gear ring & pinion sets are available for many popular applications. The thicker gears have absolutely no side effects. The thicker ring gear has lots of material exposed to the oil so it runs just as cool as a thin gear set. Not only has the aftermarket used thick ring gear sets for many years, many original equipment vehicles have used thick ring gear sets or offered thick gear set options. For example, Ford does not use any carrier breaks on any of their corporate rear ends which means that many of their gear sets could be considered “thick”. The other option that will solve the problem of dealing with a carrier break is the obvious. Buy a new carrier. This may sound expensive and in some cases it is. In many cases the carrier case is less than $100. Or, it may be a good time to upgrade to a positraction or locker. Replacing the carrier with a posi or locker allows you to upgrade and get the appropriate carrier at the same time. Next month will include a list of carrier brakes for popular truck, passenger car, and Jeep rear ends.
Differential Cost: When Is Too Much Really Too Much?
We get a lot of questions asking how much it should cost to have a rearend setup. Unfortunately, the answer is never simple, due to all the variables involved. The hourly rate a shop charges can vary from as little as $60 to over $200 per hour. Labor charges may depend on location, competence, warranty, overhead, and the individual shop or mechanic’s desire to work on differentials. Access to a flat rate book that provides standard hours required to do the job can be helpful. Ultimately, the shop is going to charge whatever they feel is fair, and we have found the flat rate books to be misleading at times. The guidelines we are about to present are only provided to help the reader in their search for a fair deal and should not be taken as gospel. If someone wants to charge more, and you want to have them do the work, then the only solution is to pay the price. However, if you feel that an equally good job can be done elsewhere, then so be it. Always consider the cost to be secondary to the quality of the work you receive. The following rates are per axle for most passenger cars, Jeeps, mini trucks, and half ton trucks, if the vehicle is driven to the shop: Rebuild with new bearings and seals using same ring & pinion: 4 to 6 hrs. Install ring & pinion, and bearings and seals if needed: 5 to 7 hrs. Install limited slip or locker, without removing pinion: 3 to 4 hrs. This list of variations or exceptions to the above rule are a few of the common things that make the job more difficult, or easier, and require an adjustment to the cost: Differential is brought in out of the vehicle: Subtract 1.5 hrs. Three quarter and one ton trucks: Add 1 hrs. General Motors independent front suspension: Add 3 to 4 hrs. Late model independent front suspension (excl GM): Add 1 to 4 hrs. Two-piece tapered axles: Add 1.5 hrs. Motorhomes or large Box Vans that do not fit on common lift: Add 4 to 8 hrs. Another thing to be aware of when shopping around is warranty. Any shop that is familiar with differentials will probably have some limitations to their warranty. Some of the common warranty restrictions that we use in our shop are: mini and mid-size trucks (Jeeps, Ford Rangers with 7.5″ diff, Toyota trucks) with tires taller than 31″; half ton trucks with tires taller than 33″; three quarter and one ton trucks with tires taller than 35″; trucks used for towing have a shorter than standard warranty; and vehicles used for competition or racing are not warranted. These may seem like extreme limitations, but they are sometimes necessary to protect the shop from people who abuse their vehicles on or off road. If you purchase parts directly from the shop doing the work, expect to pay a little more. Every shop has the right to make a profit when stocking or handling parts. And shops can be very helpful if there’s ever any warranty issues related to the parts. Use your best judgment and remember that supply and demand always hold true when it comes to quality parts and service. Popular Resources: New Gear Break-In Properly Setting Preload with Side Adjusters Size Matters
Myths Regarding Differentials
Over the years I have heard a lot of myths regarding the setup and design of differentials. Anyone with a little experience can fix a diff. I have heard time and time again that the following situations make a person a qualified differential expert: They are an old-timer, a grizzled guy with stained overalls. They are a machinist. They are in a four-wheel drive club. They have built a few rear ends for their buddies. I believe there are only a few people who really know how to setup a rearend correctly, and they have learned from years of experience and collecting facts. The gear ratio in the front of a four wheel drive has to be different from the rear so the front wheels will pull more. There have been many different ratio combinations used in four-wheel drive vehicles, but not so that the front will pull more. Gear manufactures use different ratios for many different reasons. Some of those reasons are: strength, gear life, noise (or lack of it), geometric constraints, or simply because of the tooling they have available. I have seen Ford use a 3.50 ratio in the rear with a 3.54 in the front, or a 4.11 in the rear with a 4.09 in the front. As long as the front and rear ratios are within 1%, the vehicle works just fine on the road, and can even be as different as 2% for off-road use with no side effects. 1 point difference in ratio is equal to 1%. To find the percentage difference in ratios it is necessary to divide, not subtract. In order to find the difference, divide one ratio by the other and look at the numbers to the right of the decimal point to see how far they vary from 1.00. For example: 3.54 ÷ 3.50 = 1.01, or 1%, not 4% different. And likewise 4.11 ÷ 4.09 = 1.005, or only a 1/2% difference. These differences are about the same as a 1/3″ variation in front to rear tire height, which probably happens more often than we realize. A difference in the ratio will damage the transfer case. Any extreme difference in front and rear ratios or front and rear tire height will put undue force on the drive train. However, any difference will put strain on all parts of the drivetrain. The forces generated from the difference have to travel through the axle assemblies and the driveshafts to get to the transfer case. These excessive forces can just as easily break a front u-joint or rear spider gear as well as parts in the transfer case. Positraction is better than limited slip. I have heard many people call a standard open differential a “limited slip” and I have been asked for a limited slip instead of a positraction because they wanted something that was not too aggressive. From my experience positraction and limited slip are just two different names for the same thing. If anyone can find a SAE standard or printed definition please let me know and I will gladly correct myself. Popular Resources: Diagnosing Noise (Part 1) Ford 9 Inch Differential Information Four Critical Ring & Pinion Settings
Before You Call For Rearend Parts
It may sound silly, but there are many things to consider and lots of data to collect prior to picking up the phone to find rearend parts. Unlike engine or suspension parts, rearend parts are not easy to look up, and can vary greatly on any vehicle make/model. Just because it has a specific engine size or transmission type does not mean that the vehicle uses one specific gear ratio. Vehicle manufacturers will usually offer at least two gear ratios for any given vehicle model. The gear ratio can vary with little or no correlation to its intended use or market area. I have seen many models released that offer four different ratios with little or no other variations in the vehicle. Another thing that complicates matters is there does not appear to be a standard or good book that a salesperson can use to look up the right parts for a vehicle by year, make, and model. And, for whatever reason, the VIN number is not helpful. For most vehicles, the VIN does not provide gear ratio or limited slip information. One way to get the right parts to the end user is by process of elimination. In this scenario, the vendor sells parts that they think may be right until they find the right combination. This is often referred to as the “we got your credit card number and that’s all that is important” method. But don’t count on your friends to identify the differential for you, as they may not be accurate. If the diff is not the model they say it is, there may be restock charges for sending back parts. The only sure-fire way to determine the right parts for a rearend is to find someone who really knows rearends and be prepared to answer a lot of questions. Here’s some questions to answer BEFORE calling: How do you use or plan on using the vehicle? Year, make (Chevy, Jeep, Ford, Dodge, etc.), model (1/2 ton, Cherokee, etc.) Tire size Old gear ratio New ratio you think you want Axle spline count Number of cover bolts, or is it a drop out Number of ring gear bolts Bill of material number or tag numbers Transmission type Engine size (I hope you know this one, surprisingly a lot of people do not) Engine rpm that you are comfortable cruising down the highway at. This will only work if you have a tach, and it may require driving in a lower gear to experience higher RPMs. Number of wheel lugs Trailer Weight (For those of you who pull trailers or other vehicles) Standard or reverse rotation front ring & pinion This can be determined by whether the pinion enters above or below the axle housing centerline. Reverse rotation gears have the pinion shaft entering above the axle centerline and standard rotation gears enter the housing below the axle centerline. Independent Front Suspension or solid straight axle in front Outer diameter axle bearings It may seem ridiculous to have to answer so many questions, but in the end, it is far easier to order parts once correctly, than to order and return the wrong parts several times. If you take the time to find out the answers to a lot of questions, and find a salesman who knows what questions to ask. It will save a whole lot of frustration for everyone involved, especially you. If a parts representative asks about the condition of other parts, they are usually trying to help you with a better price on all of the parts you will need for a complete repair, and save you from having to run to the local parts store after you get the differential apart. Popular Resources: Diagnosing Noise (Part 1) Ford 9 Inch Differential Information Four Critical Ring & Pinion Settings
Driveline Angles & Vibration
I have had more than a few customers come back to our service shop after a gear ratio change to complain that we caused a new vibration in their vehicle. In actuality, we inadvertently caused the vibration by increasing the driveline speed. When changing to a lower gear ratio (numerically higher) the driveline speed increases proportionally to the change in the ratio. For example, when changing the ratio from 3.08 to 4.56 there is a 48% change in the ratio and a 48% increase in driveline speed. This means that a vibration that would have been noticeable at about 90 mph is now noticeable at 60 mph. This higher driveline speed makes the vibration more noticeable because while it previously existed at 90 mph, it may have gone unnoticed due to the amount of vehicle vibrations it had to overcome in order to be noticed. If the customer installed taller tires and raised the vehicle before changing the gear ratio, the vibration is probably caused by the lift. This vibration caused by the lift and wrong driveline angles would not be noticeable until the new ratio was installed, since the tall tires and stock ratio kept the driveline speeds too slow for the vibrations to be felt. Vibrations due to wrong angles are usually easy to identify because they are harmonic or cyclic. This means that the vibration varies in pitch or intensity even when traveling at a steady speed. The results is a “whir … whir … whir” type of noise. The solution to wrong angles is easy in theory, but not always easy in practice. There have been many good technical papers written on this subject, so I won’t go into detail now. I will however cover a few of the basics. In order for a two U-joint driveline to be free of vibration it must be in balance, and the angle of the front U-joint must be the same as, or very close to, the angle of the rear U-joint. If there is a noticeable difference in the angles, there will be a vibration. If it is not possible to match the front and rear angles, a constant-velocity joint can be used at the transfer case end with no angle in the U-joint on the differential end. Although it is expensive, and only works if the pinion is not offset side-to-side from the output shaft, this is the only cure in many lift situations. I have seen vehicles use a constant-velocity joint at each end of the driveline. This is more expensive but will fix any angle problem. Another solution is to rotate the differential pinion angle up or down to match the front angle. This is usually not easy and can be accomplished with wedges, by moving the spring pads, or by rotating the axles tubes in relation to the differential center section. For some vehicles there are aftermarket kits available for lowering the transfer case or installing adjustable length control arms. Although these may seem like extreme measures, they are sometimes the only way to eliminate or lessen vibrations. Note: If the vehicle has a differential pinion offset to the side from the center of the output shaft on the transmission or transfer case, the angles due to this offset will not cause vibration. This is because the pinion shaft and the output shaft are still parallel with respect to these side-to-side angles. I have seen some lifted vehicles that vibrate no matter how much care is taken to balance the driveline and match the angles. It is one of the things that we sometimes have to live with in order to have a lifted vehicle. Popular Resources: Diagnosing Noise (Part 1) Ford 9 Inch Differential Information Four Critical Ring & Pinion Settings
Subscribe To Our Newsletter
Sign up & unlock 5% off. Get news on insider deals, product releases, and expert advice.