randys blog

Why You Need to Re-Gear Your Jeep JL
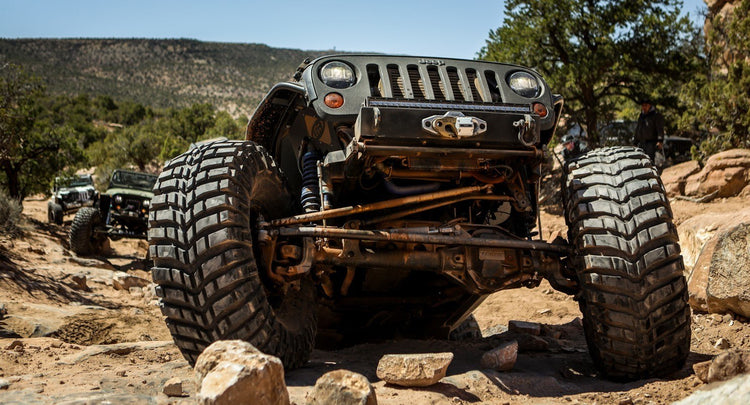
There are two main reasons to re-gear your ride. The first is to recapture the lost drivability and fuel efficiency of a daily driven vehicle that has been upgraded with larger wheels and tires. The second is to fine tune the performance characteristics of a vehicle that is a dedicated off-roader where the focus is more on low-end grunt and acceleration. We have identified a troublesome trend in the Jeep world. It seems too many Jeep JL owners think since they have an eight-speed transmission they don’t have to upgrade their gearset when they jump up in tire size. The thought process is the transmission’s gear ratios cover a wide spread and ‘compensate’ for the additional tire diameter that comes with rolling 40s. The Jeep JL’s eight-speed automatic does a fine job of adapting to the increased load of larger tires, but you wind up not realizing the full benefit of the tire upgrade if the transmission won't shift into higher gears. It's not uncommon to see the tranny hanging out in sixth at light throttle on the freeway with oversized tires. Or to feel it shuttle shifting, trying to find the right gear for the situation. Even if you’re okay with that, the undue stress on the transmission can lead to early failure and a big hit to your wallet. Changing ring and pinion gears is the answer. Check out the accompanying video and learn more about the benefits of re-gearing your JL Wrangler with Nic Ashby, the 2020 American SuperJeep Challenge Builder of the Year from Rockstar Garage. Call Now 866-631-0196 Shop All Re-Gear kits
Positraction Chatter
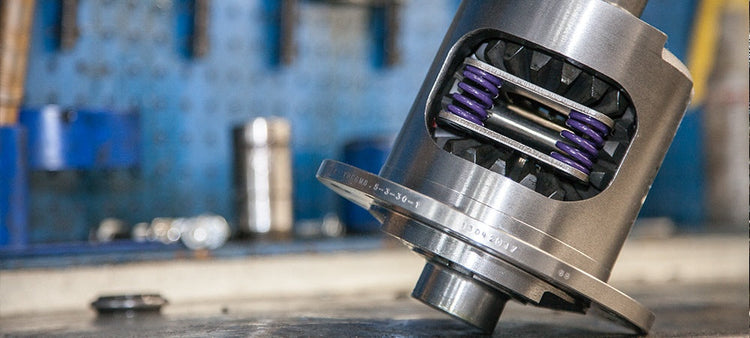
When looking for great off-road traction an aggressive positraction is one of the most popular ways to go. But, when driving on the street every day that great off-road posi may be annoying. I have found that it is very difficult to make a positraction work really well off-road and still not chatter during every day driving. Many say that they can do it but my question is can they do it consistently without any customer complaints? Positraction function has been described well by many before me so I will skip that for now. I use the words “positraction” or “posi” as generic terms for all limited slip differentials (not including lockers). Posi chatter happens when there is a lot of friction in the clutches. The friction causes the clutches to bind during a turn and twist the axles. Then the clutches let go and the energy stored in the twisted axles is violently released shaking the whole vehicle. It is kind of like a bomb with energy stored in the twisted axle instead of being store in an explosive. Posi slip happens when there is not enough friction in the clutches and they do not hold when they are needed. Sometimes this can be helped by applying the brake or parking brake lightly in order to add resistance load to the carrier assembly which increases the clutch loading. Even with aid from driving technique a slipping posi is disappointing when off-road and really disappointing when stuck with one wheel still having good traction. The ultimate positraction would slip during every day driving and then sense that one wheel is slipping a lot relative to the vehicle speed and then apply more friction. Many manufactures have attempted to achieve this through many different types of positractions. Every time I see someone promote the final solution they find a way to upgrade it a year or two later and promote the replacement as the final solution. For those of you who are really serious about off-road I suggest getting some sort of locker but that can be left for another time. Popular Resources: New Gear Break-In Properly Setting Preload with Side Adjusters Size Matters

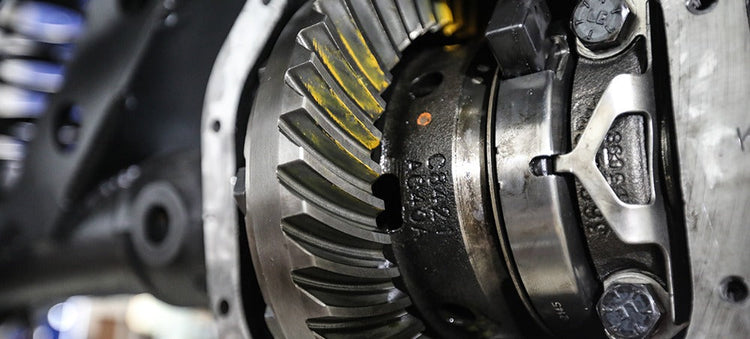
JL Metallurgy Overview
New Jeep JL platform provides design challenges in the automotive aftermarket The new JL platform from Jeep quickly became one of the significant introductions from carmakers in many years. Like every other Jeep platform, opportunities for aftermarket manufacturers to modify, lift, and design came quickly after the introduction. For aftermarket drivetrain engineers, working on the new Jeep JL platform provided with design challenges when it came to the ring and pinions. The JL launched with a new set of differentials including the D44JL Rear (M220), D44JL Front (M210) & D35JL (M200). Factory Engineers had designed the ring & pinions for higher efficiencies. Whether this had to do with increased mileage requirement or powertrain revisions, differential modifications were required throughout the platform. From a design perspective, this factory revision denotes a decrease in the hypoid offset from previous JK designs resulting in a smaller pinion head diameter with increased loading on the teeth. Stronger alloys, most notably an increase in the nickel content, are required to handle the increased loads. Most aftermarket manufacturers recognized the design change, that was the easy part. Only Yukon recognized that the design change required improvements to the metallurgy as well. Recognizing the significant changes in the OE gears for the JL platform, Yukon Engineers examined countless material and heat treatment options to effectively deal with the new hypoid offset. Yukon realized the need to manufacture the JL ring & pinion line with a premium higher strength 4320 material to hold up to the abuse and provide even higher strength than the JK. A year later, after testing Yukon against other aftermarket brands, it appears that Yukon was the only aftermarket company to move to the higher strength material and produce the strongest aftermarket gears associated with Jeep JL line.

Getting a cross pin shaft to clear a thick gear
In many cases it is necessary to grind one or more teeth on a ring gear in order to reinstall the cross pin in many c-clip style rearends. In most cases this will not interfere with the contact pattern of the gear or decrease the strength in any way as long as it is done properly. In some rare instances you may need to grind as much as ¼ of one or two teeth away. Although we have seen vehicles run with half of a ring gear or pinion tooth missing, we do NOT recommend pushing your luck that far. However, we have no problem running a gear-set in our own vehicles with 1/4 of tooth ground off of the toe or 1/8th of the heel of one or two of the ring gear teeth. Gear grinding should always be done on the bench top, not while gear is installed. This is to avoid getting metal and other contaminants into the housing or differential carrier. In most cases you will only need to grind about 1/8” off the corner of the tooth. After the desired amount of material is removed, you need to use a medium grit 3M disk to round the edges and remove any burrs. Be sure to clean a gear thoroughly before you reinstall it into the housing. Getting a cross pin shaft to clear a thick gear - In many cases it is necessary to grind one or more teeth on a ring gear in order to reinstall the cross pin in many c-clip style rearends. In most cases this will not interfere with the contact pattern of the gear or decrease the strength in any way as long as it is done properly. In some rare instances you may need to grind as much as ¼ of one or two teeth away. Although we have seen vehicles run with half of a ring gear or pinion tooth missing, we do NOT recommend pushing your luck that far. However, we have no problem running a gear-set in our own vehicles with 1 4 of tooth ground off of the toe or 1 8th of the heel of one or two of the ring gear teeth. Gear grinding should always be done on the bench top, not while gear is installed. This is to avoid getting metal and other contaminants into the housing or differential carrier. In most cases you will only need to grind about 1 8” off the corner of the tooth. After the desired amount of material is removed, you need to use a medium grit 3M disk to round the edges and remove any burrs. Be sure to clean a gear thoroughly before you reinstall it into the housing.
Properly setting preload with side adjusters
There are several types of rear ends that use a threaded side adjuster be it a single adjuster or one on both sides of carrier. The most commonly known rears with this type of carrier adjustment are the Chrysler 7.25-8.25-8.75-9.25, Ford 9”, GM 8.25” IFS, Suzuki Samurai, & Toyota. The GM 9.5” is a little different than most as one side uses shims but the other side is the threaded adjuster. Randy’s has tools that work with a 1/2” drive ratchet or breaker bar that work much better than beating the heck out of the adjuster with a punch & hammer. These side adjuster tools are priced starting at $29.00. Most people are reluctant to really crank on these adjusters to preload the carrier bearings. It is perfectly normal to have 150-200 ft lbs of torque on the side adjusters. It is very important to obtain good preload to avoid damage to your differential. At Randy’s, our service shop uses a 1/2” breaker bar, as shown in illustration 1A. The reason we do this is because as you accelerate, the pinion wants to make the ring gear deflect. The more power, the more it will tend deflect. Housings always flex, some more than others, depending on whether it’s stock or an aftermarket nodular. If you put a lot of preload on the carrier bearings it also preloads the housing. Since the housing is already flexed, it is not likely to flex even more causing the ring gear to move away from the pinion resulting in broken teeth. Properly setting preload with side adjusters - There are several types of rear ends that use a threaded side adjuster be it a single adjuster or one on both sides of carrier. The most commonly known rears with this type of carrier adjustment are the Chrysler 7.25-8.25-8.75-9.25, Ford 9”, GM 8.25” IFS, Suzuki Samurai, & Toyota. The GM 9.5” is a little different than most as one side uses shims but the other side is the threaded adjuster. Randy’s has tools that work with a 1 2” drive ratchet or breaker bar that work much better than beating the heck out of the adjuster with a punch & hammer. These side adjuster tools are priced starting at $29.00. Most people are reluctant to really crank on these adjusters to preload the carrier bearings. It is perfectly normal to have 150-200 ft lbs of torque on the side adjusters. It is very important to obtain good preload to avoid damage to your differential. At Randy’s, our service shop uses a 1 2” breaker bar, as shown in illustration 1A. The reason we do this is because as you accelerate, the pinion wants to make the ring gear deflect. The more power, the more it will tend deflect. Housings always flex, some more than others, depending on whether it’s stock or an aftermarket nodular. If you put a lot of preload on the carrier bearings it also preloads the housing. Since the housing is already flexed, it is not likely to flex even more causing the ring gear to move away from the pinion resulting in broken teeth.
Subscribe To Our Newsletter
Sign up & unlock 5% off. Get news on insider deals, product releases, and expert advice.