
randys blog

How It Works: Yukon Dana 30 CAD Delete Kit
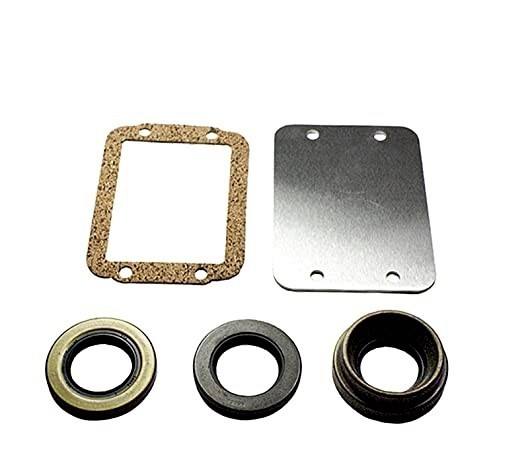
What is CAD? What is CAD? It’s not short for Cadillac… In this case it’s not the acronym for Computer Aided Design… For our purpose CAD stands for "Central Axle Disconnect." At its core, the Yukon Dana 30 CAD Delete Kit blocks off the vacuum actuated engagement of four-wheel drive in Dana 30 differentials. Select Jeep vehicles produced from 1984 to 2001 are equipped with the automaker’s reverse rotation Dana 30 differential that’s outfitted with the Central Axle Disconnect (CAD) system. The system components, located on the passenger-side axle tube, consist of a two-piece splined shaft and a coupler that a vacuum-operated shift fork actuates to connect or disconnect the axle, which engages or disengages four-wheel drive. Dana 30 Heritage The Dana 30 has been the go-to front diff for the Jeep Wrangler since the model’s Jurassic Period… CJ-5 models of the early 1970s. Available in high- and low-pinion versions as well as standard and reverse rotation versions, the Dana 30 is an important building block in the Jeep hierarchy. There are tons of aftermarket parts for this differential and spares waiting for rescue in junkyards across the country. CAD Versus The Elements Time is no friend to the CAD system. The vacuum lines can crack, the vacuum motor can fail, or the system can be compromised in another manner, and cause the Jeep to be stuck in two-wheel-drive… that’s no fun. Further, the two-piece axle is not as strong as a one-piece design. Fortunately, the stronger and more reliable one-piece axle from a TJ or ‘non-disconnect’ XJ are direct swaps. The catch… sealing the housing post-swap. Yukon To The Rescue Enter the Yukon Dana 30 CAD Delete Kit. It consists of a disconnect housing blocking plate, gasket, and inner axle seals that will accommodate a one-piece axle design. Yukon Dana 30 CAD Delete Kit Applications 1984 - 2001 Jeep Cherokee XJ 4WD 1984 - 1998 Jeep Cherokee XJ Sport 4WD 1986 - 1992 Jeep Comanche MJ 4WD 1984 - 1991 Jeep Grand Wagoneer ZJ 4WD 1993 Jeep Grand Wagoneer ZJ 4WD 1987 - 1995 Jeep Wrangler YJ 4WD End Of The Trail The Dana 30 has been around since the prehistoric days of the Jeep brand… and it’s not going anywhere. Neither is Yukon Gear & Axle. We have a vast inventory of replacement parts that will keep Dana 30s on the road and performance products that will improve the breed. Happy Wheeling. contact us at 866-631-0196 Shop CAD Delete Kits
Breaking In Your Ring And Pinion
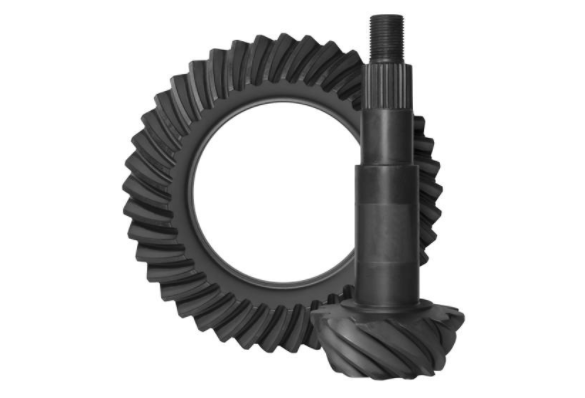
Gear break-in consists of controlled heat cycling of the gear set in a way that properly seasons or hardens the gear’s contact surfaces. It is a series of test drives. These critical first few miles of drive time can be the difference between a gear-melting headache and years of carefree driving. Failure to properly break-in your gear set can result in damaged, failing gears, and a complete re-do. Read this article in Español Once the wrenches have been laid down and the gears have been properly installed with pinion depth, backlash, and preload correctly set there’s still more to do. The break-in process is really important if you want to have your gears last a long time and perform the way you want them to. The First Drive In the first couple of miles you will want these to be in-town speeds, 15 to 20 mph. Drive for 20 minutes or so, let the diff cool off for about a half an hour, and then repeat the process. Next time you drive your vehicle you’ll want to do some freeway runs. Drive about 15 miles, then pull over and let the drivetrain cool down for about 20 minutes and do this for about 45 miles or so. It may seem like a headache, but it is worth it to ensure the gears are broken in properly instead of burning them up and creating a bunch of metal sledge in your differential. Proper Oiling The next important component is to ensure you have proper lubricants. For the first 500 miles run 80W-90 conventional oil, drain it, and then refill the diff. RANDYS recommends a non-synthetic oil if your set-up features a Dura Grip clutch-type limited slip differential. If you’re running a helical LSD or a locker, synthetics are great for those applications. Break-In For Rigs That Tow Towing with your vehicle or using it for extreme off roading adds additional pressure to the pinion and can slightly change its position on the ring gear teeth. This means you are essentially hardening a new spot on the gear. Therefore, we strongly encourage drivers to follow the same break-in procedure while either towing, hauling, or driving off road. Even if you’ve already broken in the gear set with no addition load follow the same speeds and distances of your previous break-in drives. Start with in-town speeds of 15 to 20 mph, cool down, and repeat. Then hit the freeway and drive 15 miles at 45 to 50 mph, cool down, and repeat for 45 miles. Long distance hauling is the killer for any ring gear set as you are constantly generating heat without cooling which will break down the gear oil and burn up the gear surface. This is why we recommend a gear oil change after the first 500 miles. If you want to protect your investment and get the best performance out of your gears, then proper break-in is critical. Following the guidelines outlined here will ensure you get the expected results.
How It Works: Spider Gears - Video
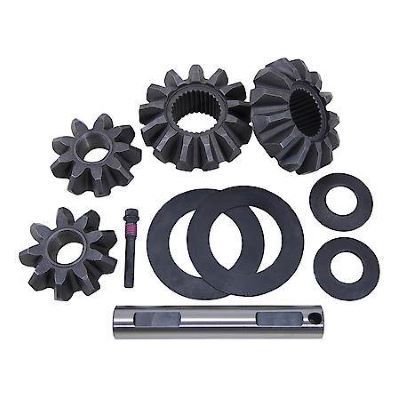
Spider gears are primetime players inside the differential. Also known as satellite gears, spider gears rotate around the side gears in the differential carrier. Side gears may also be referred to as axle gears or planetary gears. To spot spider gears look for the gears with the cross-pin shaft going through them. Read this article in Español What Gears Do The diff’s array of spider and side gears take the rotational energy from the driveshaft and help redirect it outwards to the axles and on to the tires. More importantly, they also play a key role in allowing the tires to rotate smoothly at different speeds when the vehicle is turning. Gears In Trouble Broken spider gears will make a grinding or banging sound when the vehicle is turning because the difference in wheel speeds causes the chatter. You usually won’t hear them when traveling in a straight line because the spider gears remain motionless within the carrier in this instance. But, if they are bad enough, compromised spider gears will make noise even when going straight. When you hear a loud differential think of metal flakes being formed and circulated throughout the unit, usually damaging the vulnerable bearings first. So, noise means trouble. In some cases, the damage may not be the gears themselves. When the spider gears are in motion they rotate on the cross-pin shaft, especially when the vehicle is turning a corner. But there are situations that can cause over spinning and the result can be a heat-scored cross-pin shaft. A common scenario is getting stuck in the mud or snow and free spinning your wheels trying to break free. When this happens, the spider gears can rotate on the cross-pin shaft so quickly that the differential oil is slung away, resulting in metal-on-metal wear. In extreme cases the cross-pin shaft and the gear get so hot that they melt each other, sometimes to the point where they weld themselves together. Damage such as this can not only damage the spider gear set, but also destroy the carrier and ring and pinion gear set. Spider Gear Replacement When replacing spider gears you are, in fact, replacing both the spider gears and the side gears. Over the miles these gears mesh and wear in unison, so dropping in new spider gears with the original side gears can cause an imbalance. Yukon Gear & Axle and USA Standard Gear spider gear kits include two side gears, two pinion gears, a cross pin shaft, a roll pin, and thrust washers. Installation is relatively straightforward. For a more in-depth look, view the accompanying installation video from our YouTube channel. contact us at 866-631-0196 Shop Spider Gear kits
SÍNTOMAS DE DIFERENCIAL DAÑADO. LOS SONIDOS DE LA MUERTE
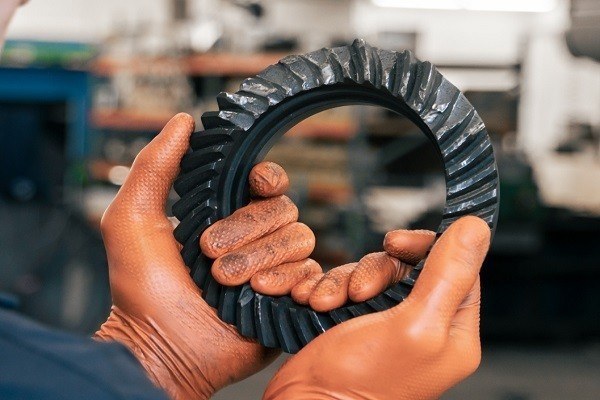
Si has frecuentado las pistas de competición indudablemente te das cuenta de lo ruidoso que es un hot rod cuando suelta el embrague y luego suelta una carga de engranajes y metal en la pista. En los senderos un vehículo con problemas finalmente se engancha y de repente el torque o el par es demasiado para el diferencial, lo que lleva a la unidad a su desaparición final. Un diferencial también puede tener una muerte lenta y te puede alertar de esa inminente muerte. Un vehículo en movimiento emite muchos diferentes sonidos, la mayoría transmite un estado armonioso. Pero puede haber temblores. A medida que las cosas comienzan a estar mal en un diferencial, hay ruidos que te dan pistas de que algo anda mal y saber qué significan los ruidos te ayudará a determinar cuál es el problema. Con este fin, ofrecemos este resumen de ruidos comunes y su probable punto de origen. Los sonidos de la muerte Cuando estas viajando a velocidades normales de carretera es probable que un sonido como un "zumbido" generado por la descarga a través de la desaceleración se deba a una falla del rodamiento del piñón o una deficiente precarga del rodamiento del piñón. En esta foto se puede ver un verdadero gritón. Una manga aplastada o una falla del rodamiento del piñón provocó que el piñón intentara comerse el carrier/transportador Este mal a menudo se diagnostica como una corona y piñón defectuosa. Bajo una carga positiva cuando se genera un sonido como "gemido" o "aullido", por ejemplo la aceleración está más en línea con el engranaje piñon corona desgastado o defectuoso o un conjunto de engranaje corona piñon que no se ha configurado correctamente. Cuando estas viajando a velocidades superiores a las 20 mph y y usted detecta un sonido “retumbante” que tiende a cambiar de frecuencia mientras el vehículo está girando, puede ser causado por los rodamientos del carrier/transportador desgastados. Pero también podrían ser los rodamientos de una rueda defectuosa. Para confirmar, levante el vehículo en la esquina donde sale el ruido y mueva la llanta. Si hay mucho juego en el aro /llanta lo más probable es que el rodamiento de la rueda sea el culpable. Un sonido como un “chasquido” que se detecta cada pocos pies puede ser un diente roto en su piñon corona. Si recientemente has cambiado tus llantas, comprueba el interior de la rueda para ver si existe un contrapeso expuesto que pueda estar golpeando el cuerpo del amortiguador en cada revolución. Un "golpeteo" más agresivo cuando toma una curva puede ser causado por engranajes satelitales quebrados, una lubricación pobre en los diferenciales de deslizamiento limitado y un embrague gastado en los diferenciales de deslizamiento limitado. Reglas básicas En este proceso, escuchar el sonido es bastante fácil ...rastrear la fuente es la que puede ser complicado. El gran desafío es tratar de diferenciar entre el sonido de un rodamiento defectuoso dentro del diferencial al sonido de un rodamiento de la rueda que está fallando. El sonido es similar. Uno de los factores determinantes es el hecho de que el ruido de los rodamientos de la rueda cambiará con la velocidad de la rueda, pero generalmente no cambiará con las variaciones de carga, por ejemplo la aceleración o la desaceleración, pero el sonido de un diferencial trasero dañado cambiará con la velocidad de la rueda y la carga. Escuche con sus ojos Las fugas también son señales de advertencia. Pueden ser precursores de problemas o el resultado de problemas. Si bien algo de fluidos debajo del vehículo puede ser parte de la condensación del funcionamiento normal, notar goteos rojizos puede ser un signo de una fuga de líquido de transmisión. Un sello o junta dañada puede robarte esa lubricación vital, lo que resulta en partes internas sobrecalentadas y secas así como fallas inminentes. La conclusión aquí es que cualquier ruido que venga de su tren motriz, ya sea que pueda ubicar la fuente o no, es un asunto serio. Rastrear la causa es fundamental para evitar daños más graves y reparaciones más costosas. Para obtener más información sobre los sonidos de la muerte, consulte el video de identificación del ruido de la corona y piñón que lo acompaña. El video está en inglés pero hemos realizado la traducción en español como veras esta en la parte abajo. Fuente original del artículo en inglés: The Sounds Of Death: A Failing Differential Story Gracias por tomarse el tiempo para ver los consejos técnicos de Yukon. Hoy vamos a discutir cómo identificar el ruido de los engranajes del diferencial, dentro del diferencial, hay muchas formas diferentes de acercarse al ruido, pero hoy hablaremos del ruido de los engranajes durante desaceleración. La causa número uno del ruido del engranaje de desaceleración es la pérdida de la precarga del rodamiento del piñón. Cuando sus rodamientos están presionados en su manga de aplastamiento, se sienta entre ellos y crea tensión en los rodamientos internos y externos esa precarga los puede dañar. Por último cuando estás conduciendo por la carretera, una tuerca del piñón se suelta, dentro del espacio de la carcasa tendrás esos rodamientos moviéndose alrededor del eje, esto creará un ruido y desaceleración por permitir a los engranajes moverse mucho por dentro. si se encuentra con esto, tendrá que desarmarlo, reevaluar y de nuevo configurar su precarga además asegúrese de que están dentro de las especificaciones. Gracias por ver este consejo técnico de Yukon sobre cómo identificar el ruido de los engranajes.
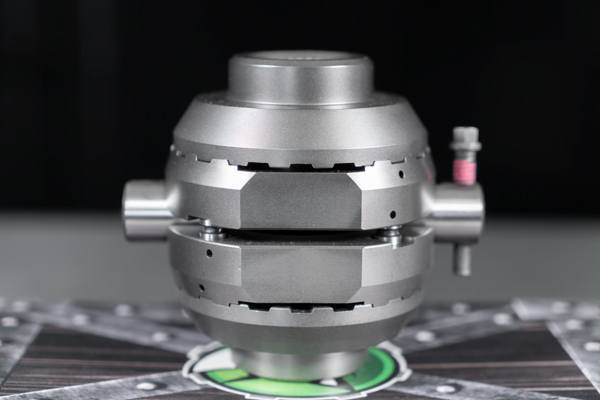
How It Works: Lunchbox Lockers
The Spartan Locker, USA Standard Gear’s lunchbox locker, provides game-changing traction at a low cost. A locker physically joins the drive axles together so they deliver an equal amount of torque to each tire, regardless of available traction. Lockers come in two flavors… selectable or mechanical. What are the Different Types of Lockers? A selectable locker is an on-demand unit that the driver activates electronically or pneumatically via a cockpit-mounted button. A mechanical locker is always active, providing traction 24/7. The Spartan Locker and Yukon Grizzly Locker are mechanical. The Yukon Zip Locker is an air locker or selectable locker that uses a pneumatic system for actuation. The Spartan Locker is flanked by a Yukon Grizzly Locker (left) and a Yukon Zip Locker (right). In mechanical lockers, also called automatic lockers, on-throttle driving conditions, where load is applied to the differential, induces locking. Off-throttle situations, where the diff is unloaded, leads to a partially unlocked unit. When the vehicle turns and the two wheels on the axle turn at different speeds, the unit makes a clicking sound as the square-cut side gears move over and past one another. This ratcheting sound can be loud and is why mechanical units may not be best suited for vehicles that spend a lot of time on the street… it all depends on how sensitive your ears are. What’s for Lunch? The lunchbox locker name is a loose reference to that handy mid-day meal carrier we all know and love. Just as you can put a different kind of meal in your lunchbox, the lunchbox locker allows different internals to be put in your differential… the internals being the lunch and the differential carrier being the box portion of the equation. Lunchbox lockers are not a singular component you swap in, but a collection of parts that converts an open differential carrier (and only an open differential carrier) into a mechanical locker. A typical Spartan Locker consists of a pair of drivers, two spacers, two side couplers, four alignment pins, four pre-load springs, a hardened cross-pin shaft, a roll pin, and installation wires. Depending on the differential carrier design, your Spartan Locker could have more or less components in the box. Pros and Cons of Lunchbox Lockers Great grip on a budget is the lunchbox locker’s calling card. Price is the biggest pro for the lunchbox locker. They cost less than half the price of an air locker, and remember this is before factoring in the cost of a pneumatic operating system. The lunchbox locker is about a third of the price of a large-frame mechanical locker / automatic locker. Going with a lunchbox locker also pays off when it comes to installation. Since the process is less labor intensive than a large-frame locker installing a lunchbox locker costs less. The savings can be even more substantial if you handle the install yourself. The Spartan Locker's patent-pending design replaces the spider gears in a standard carrier case, does not use the thrust washers, and has a revolutionary spring-and-pin design that makes installation quick, easy, and much cheaper that other types of lockers! Further, in some cases, the install does not require the removal of the differential. A disadvantage of this is the lunchbox locker relies on the factory carrier for strength. Large-frame lockers, like the Grizzly and Zip, replace the carrier as a single unit and their case is constructed from a much stronger alloy steel compared to the factory carrier. Being locked all the time, mechanical lockers can cause accelerated tire wear. As with many modifications, it’s a game of trade-offs. Installation Tips and Tricks If you’re able to remove the spider gears with the carrier still in the housing the installation can be done without removing the carrier from the diff. If it’s too tight in there, the diff will have to be removed. Spartan Lockers come with a highly detailed installation manual that includes tons of photos and step-by-step instructions. The manual addresses installation in a variety of differentials. Basically, the Spartan Locker’s drivers are assembled with the alignment pins and springs installed. The installation wires keep the assembled unit together until installation is finalized then they’re removed releasing the spring tension that’s needed to operate the unit properly. Spartan Locker Installation Quick Tips For Use in Open Differentials Only Remember to Re-Install Carrier Shims and Bearing Caps in the Same Place Punch Mark Bearing Caps to Indicate Which Side to Install Them On Be Sure Tires are Same Circumference to Ensure Proper Locker Engagement Are Lunchbox Lockers for You? Vehicle usage is the tipping point. Not just how much your rig will see the street where the boisterous operation of the lunchbox locker comes into play but off-road usage as well. Your expectations on the trail; and how much you’ll be demanding from the driveline come into play. If you’re staying on the trail with moderate hill climbing, scrambling over rocks, and the like, the lunchbox is a good call. If you plan to be more aggressive and looking to get into some extreme situations where a great deal of torque and load shocking are the norm, a large-frame locker may be the way to go. When it comes to the ratcheting and clunking sounds the unit makes, read up on the subject. Some users report the sound isn’t that intrusive, others say the noise fades with use. As we indicated before, the performance game is made of trade-offs… but the payoff is big. Spartan Locker Highlights Big on Traction, Low on Cost For Use in Open Differentials Only Patent Pending Design Replaces Spider Gears Low-Cost Shop Installation - Can be DIY Installed Reliable 100% Lockup Power Transfer Features Heat-Treated 9310 Steel Internals for Enhanced Durability Shop Spartan Lockers or contact us at 866-631-0196