randys blog

Size Matters: The Ring Gear To Pinion Tooth Relationship
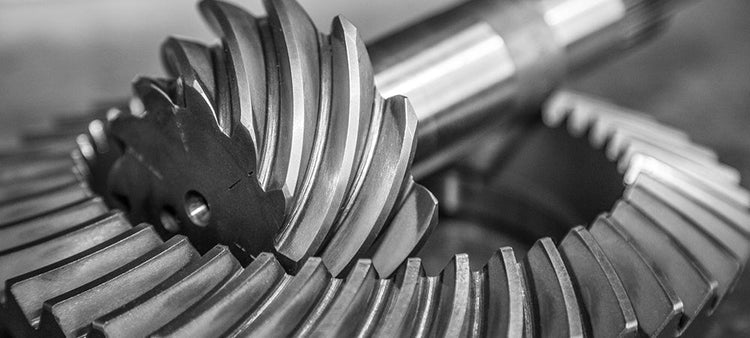
Whenever the gear ratio in a differential is changed, pinion diameter changes. There are two things that must change in order for the gear ratio to change. First, some basic information. The gear ratio is determined by the tooth combination. The number of teeth on the ring gear divided by the number of teeth on the pinion (eg: 41/11 = 3.73) equals the gear ratio. Also, in order for the teeth to have the proper mesh and contact, the relative size of the two must be changed to match the ratio. If the gear ratio is 3.00 to 1, the distance from the pinion shaft centerline to center of the pinion teeth must be 1/3 the distance of the center of the ring gear teeth to the ring gear center line. This means that the pinion shaft is roughly 1/3 the diameter of the ring gear for a 3.00 to 1 gear set. This also means that the pinion size for a gear set that is 5.00 to 1 must be only about 1/5 the size of the ring gear. The ring gear diameter is generally constant for any particular differential design regardless of the ratio. This means that the pinion size changes with the ratio and for lower gears (higher numerically) the pinion teeth are smaller. There are a few problems that go hand in hand with a small pinion head. The first are the facts that there are either smaller pinion teeth or fewer of them. The smaller teeth have less material supporting the load surface and it is a lot easier to break them off. In cases where there are fewer pinion teeth, there are fewer teeth contacting the ring gear teeth at once. In taller gears (lower numerically) such as 3.08’s, there are about two pinion teeth contacting the ring gear at any time. During the transition from tooth to tooth as the assembly turns, there may be half of one tooth contacting in the lead in position while another tooth has full contact in the center, and the trailing or exiting tooth may have half contact. This makes for smoother transitions from tooth to tooth and increases strength. In a situation where the ratio is extremely low (numerically higher) such as 5.71, there may only be about one tooth contacting at a time. The transition here goes from a fraction of a tooth on the lead in position and almost full contact on the trailing tooth, to almost full contact on the lead in and only a small fraction of contact on the trailing tooth as the ring and pinion gears rotate together. The main point is that there is not much contact to carry the load when the ratio is numerically high. Many off-roaders are aware of this problem and still kid themselves into thinking that they will not have the same problems is they only drive carefully. Yeah, right. Some Toyotas, some Jeeps, and many small or mid size vehicles use differentials that do not lend themselves well to tall tires and low gears. The diameter of the ring gears are limited by the housing designs and the best way to re-gain strength is to upgrade to a larger differential. Why not make the ring gear smaller or larger? The ring gear diameter is limited by the carrier case that it bolts to, and by the amount of room in the housing. Some of the high-speed freeway ratios for the 9-inch Ford such as the 2.50’s and the 2.41’s use a ring gear that is slightly smaller in diameter than 9″ because there is not enough room in the housing for a huge pinion head to fit. Before you start thinking of some way to extend this idea into something that helps the off-roader, there is a solution that is already available. Upgrade to a differential that uses a larger ring gear and pinion set. Even the commonly worshipped Dana Spicer Model 44 does not hold up well to tall tires and ratios in the 4.89 plus range due to its 8-1/2″ ring gear and short teeth. Some of the larger designs such as the 9″ Ford or Dana 60 are worth the time and money if tall tires or other conditions require low gears. The 9″ Ford uses a very large hypoid offset that reduces ground and driveline clearance but definitely increases strength. The Dana 60 provides more strength through sheer size. The D60 uses a 9-3/4″ ring gear and huge bearings to support the pinion shaft. Even with ratios in the 7.17 range this is still a very strong differential. Some other options are the Toyota Land Cruiser, the 14 bolt Chevrolet, Dana 70’s, Dana 80’s (this one is truly HUGE), and the 8-3/4″ Chrysler. Find a competent chassis builder, off-road shop, or complete differential shop and they can help you find the differential that is best for your application.
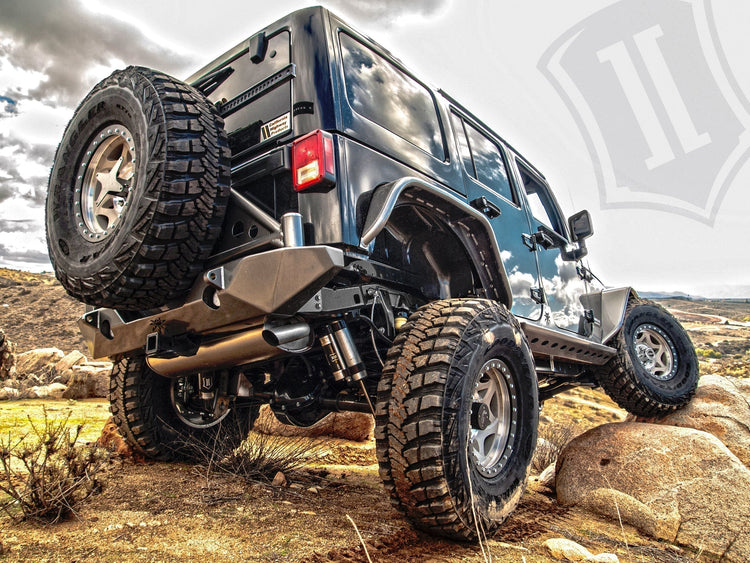
ICON Vehicle Dynamics Impact Off-Road Armor For Jeeps
The trail can be rough on your Wrangler. Protruding obstacles conspire to damage rocker panels and underpinnings. Bumpers can take a beating but they also need to do more than sit there. A properly outfitted bumper will increase your approach/departure angle, serve as a tow point for rescue, house additional lighting, and secure your all-important winch. Fortify your JK, JL, or JT Jeep Wrangler with ICON Impact Off-Road Armor from RANDYS. We are offering rocker panels, skid plates, and a number of different front and rear bumper designs. You can also step up your game with upgraded body-mount tire carriers, spare tire delete kits, license plate relocation kits, fender liner kits, and fairlead mounts. ICON Impact PRO Series Body Armor & Slider Kit Low-hanging rocker panels are inherently vulnerable to damage. Protect them with a two-piece Body Armor & Slider Kit. The rocker guards are fabricated entirely of 3/16-inch thick plate steel that has been CNC laser cut and precision brake-formed to match every contour of your Jeep’s body. It attaches directly to the vehicle’s body mounts, protecting against rocks and dings around the door sills. The rock slider provides a defensive railing that slides against rocks, stumps, and other protruding obstacles to keep your Jeep's doors and body sides out of harm’s way. – Ties in to body mounts at the frame, producing a rigid structure – Rock slider also serves as a step to assist entry into lifted Jeeps – Rugged 3/16-inch thick plate-steel construction – CNC laser cut and brake-formed to perfectly match rocker panel contours – Durable multi-stage semi-gloss black powder coat finish Shop Rock Sliders ICON Impact COMP & PRO Series Bumpers High and Tight like a tidy military haircut is one way to look at ICON Impact Series bumpers. These tough, stubby, minimalist bumpers are designed for the hardcore rock crawler who values light weight and maximum clearance. Impact Series rear bumpers are available in three versions; the COMP Series, the original PRO Series, and the PRO Series 2. The big difference is the mounting procedure. All three versions are adept at protecting the vehicle’s rear corners while offering the most possible clearance for navigating tight trails and overcoming obstacles. To install a COMP Series unit, part of the Jeep's frame rails is cut off in order to provide incredible, nearly-vertical departure angles while the PRO and PRO Series 2 are designed with the smallest form factor possible without cutting into the Jeep's frame rails, ensuring you still enjoy phenomenal ground clearance and departure angles all with a bolt-on-and-go installation. ICON Impact bumpers are constructed from 3/16-inch plate steel and shackle tabs are fabricated from one-inch plate steel. In bumpers with integrated tow hitch accommodations, ICON delivers the most convenient, trail-friendly package possible. Impact Front Bumpers Barely wider than the Jeep's frame rails, Impact Series front bumpers allow full turn and full suspension articulation on big-tire rigs while also granting front tires clear access to grip and climb up onto boulders, rock walls, and other extreme trail obstacles. Choose from a number of innovative designs, each mixing in different impact bar configurations, angled shackle tabs, winch mounts, and fog light accommodations. Bumpers are constructed from 3/16-inch plate steel, impact bars are fabricated from heavy-wall DOM tubing, and shackle tabs are made with one-inch plate steel. - Compact, stubby design provides light weight and maximum clearance - Low-profile impact bar protects winch and grille area from trail hazards - Impact bar and stinger made of 1-3/4 inch or 1-1/2 inch by .120 wall DOM tube - Bumpers feature laser-cut plate steel gussets Extreme duty one-inch thick recovery shackle tabs are angled for maximum clearance - Top-mount winch location allows easy access to the drum and keeps the winch out of the mud - Rugged CNC laser cut and brake-formed 3/16-inch thick plate steel construction - Durable semi-gloss black powder coat finish Impact Rear Bumpers Rear bumper can also be ordered in different configurations. Back-up lighting may be provided by a pair of protected, recess mounted 2.5" LED back-up lights (lights sold separately). To provide trailer tow convenience in the most trail-friendly package possible ICON has positioned the tow hitch to tuck up high and tight. ICON bumpers are a great way to add function and style to your rig. - Faceted high-clearance design to maximize departure angle and clearance - Extreme-duty one-inch thick recovery shackle tabs are angled for maximum clearance - Rugged CNC laser cut and brake-formed 3/16-inch thick plate steel construction - Durable semi-gloss black powder coat finish Shop Bumpers
ICON Alloys’ Revolutionary InnerLock Bead Retention Technology
Go low, get more grip. Experienced off-roaders know dropping air pressure can transform your trail running experience. The benefits include improved ride quality, especially over undulating washboard surfaces, a larger contact patch for increased traction, and the ability to grip and climb rocks and other jagged obstacles. However, running at very low pressures also increases the risk of de-beading the tire during extreme side loads or aggressive driving. While traditional beadlock wheels address this issue by clamping the tire’s bead, they also need frequent maintenance, require specialty tools/parts, increase rotational mass, and are NOT legal for on-road use. Get a “best of both worlds” solution with ICON Alloys’ patented InnerLock technology. It uses a robust bead-retention system to keep the tire bead secured to the wheel while also being fully DOT compliant and street legal. The InnerLock system uses a series of O-ring sealed, hardened alloy pins that are threaded on the inner side of the tire bead to create a barrier that prevents the tire from unseating during extreme side loads. Additionally, InnerLock wheels are lightweight, strong, don’t require bolt retorquing, and are street legal for the ultimate blend of on-road safety and off-road performance. The InnerLock system is current available on ICON Alloys Rebound PRO, a dynamic eight-spoke design that can presently be ordered in 17-inch sizes in a variety of bolt patterns, and colors. - A stylish street-legal beadlock wheel - Uses ICON Alloys patented InnerLock technology - InnerLock features removable, reusable, and replaceable bead retention pins - Quick, easy, and safe tire installation and removal - Works without the need for any shims or special tools - Application-specific dimensions optimize vehicle dynamics and tire clearance - Reduced un-sprung weight and rotating mass improves handling - Rebound Pro wheel sports a stout 3,200-pound load rating Shop ICON Alloys

ICON Vehicle Dynamics Impact Off-Road Armor For Jeep Wranglers
The trail can be rough on your Wrangler. Protruding obstacles conspire to damage rocker panels and underpinnings. Bumpers can take a beating but they also need to do more than sit there. A properly outfitted bumper will increase your approach/departure angle, serve as tow point for rescue, house additional lighting, and secure your all-important winch. Fortify your JK, JL, or JT Jeep Wrangler with ICON Impact Off-Road Armor from RANDYS. We are offering rocker panels, skid plates, and a number of different front and rear bumper designs. You can also step up your game with upgraded body-mount tire carriers, spare tire delete kits, license plate relocation kits, fender liner kits, and fairlead mounts. ICON Impact PRO Series Body Armor & Slider Kits Low-hanging rocker panels are inherently vulnerable to damage. Protect them with a two-piece Body Armor & Slider Kit. The rocker guards are fabricated entirely of 3/16-inch thick plate steel that has been CNC laser cut and precision brake-formed to match every contour of your Jeep’s body. It attaches directly to the vehicle’s body mounts, protecting against rocks and dings around the door sills. The rock slider provides a defensive railing that slides against rocks, stumps, and other protruding obstacles to keep your Jeep's doors and body sides out of harm’s way.
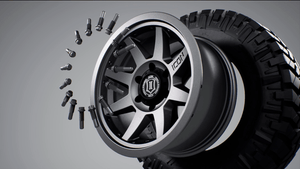
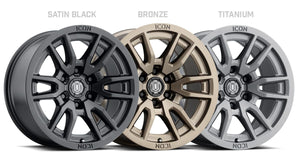
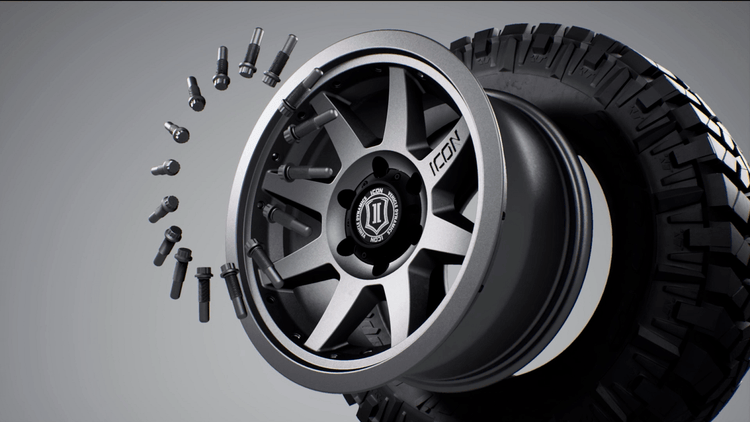
ICON Alloys Wheel Collection From RANDYS
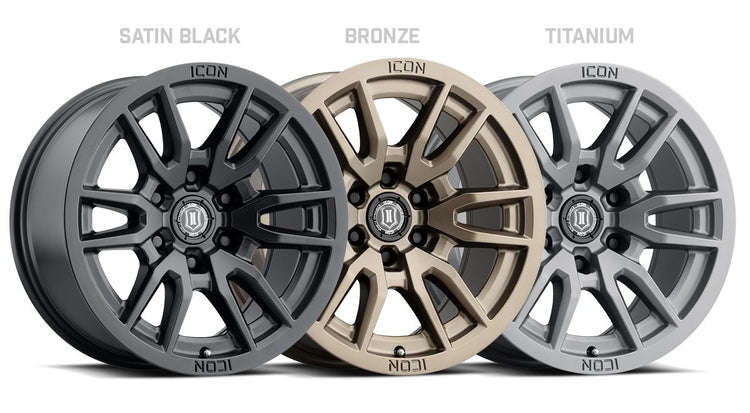
Wheels from ICON Alloys are the perfect blend of form and function. ICON wheels are engineered on a per-application basis to maximize caliper clearance and optimize wheel position for un-hindered suspension travel and steering function. Backspace and wheel offset dimensions have been strategically developed to reduce scrub radius, improving all-around handling and ride quality. Choose from 15-, 17-, 18-, and 20-inch sizes, in widths ranging from 7 to 10 inches, and lug patterns from 4x156 to 8x180, including most popular six- and eight-lug applications. Available in Bronze, Satin Black, Gloss Black, Gunmetal, Gold, Satin Brass, and Titanium finishes, ICON Alloys have been strength tested to yield load ratings between 1,850 and 4,000 pounds. The ICON Alloys wheel collection was created to end clearance, fitment, and steering geometry issues that limit the drivability and performance. Application-specific dimensions optimize vehicle dynamics and tire clearance Reduced un-sprung weight and rotating mass improves on- and off-road vehicle performance Aluminum alloy construction provides strength properties that are well suited for off-road use Shop ICON Alloy Wheels
Subscribe To Our Newsletter
Sign up & unlock 5% off. Get news on insider deals, product releases, and expert advice.