Understanding Thick Ring Gears & Carrier Breaks
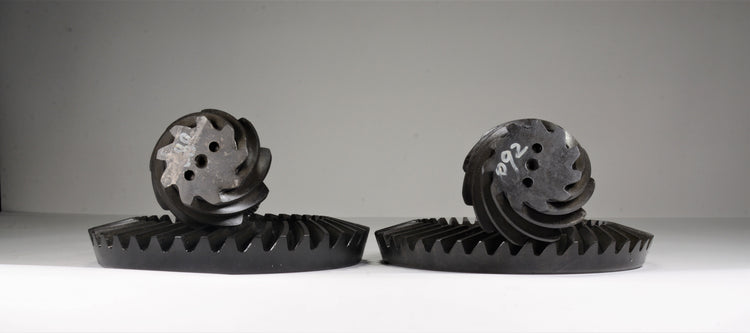
A carrier break is the point where the numeric increase in gear ratio necessitates a new/different carrier be used. The act of increasing the numerical ratio of a gear set results in the diameter of the pinion gear becoming smaller. To maintain proper contact, the thickness of the ring gear must be increased. The point at which thickening is no longer viable is known as the Carrier Break, which necessitates the move to a larger carrier with a taller deck height. Thick Ring Gear Case Study We will be looking at two gear sets for the GM 12T differential. The 3.73:1 set is the maximum numeric size that the stock carrier can handle…. Going to a 4.11 breaks the bank, and the carrier. The size of the pinion gear head is the linchpin. As the numeric size of the gear goes up the pinion size decreases, until the point when it can no longer properly engage the ring gear. The 12T 3.73 set features an 11-tooth pinion and the 4.11 sports a nine-tooth pinion which is too small in diameter for proper engagement so the 4.11 kit has a thicker ring gear to make up the difference and provide proper engagement. In some instances, a thinner ring gear may be needed to stay within deck height specs. The break point is typically determined by the placement of the carrier case and the pinion centerline, and those are really arbitrary and up to the whim of a design engineer. We do NOT recommend ring gear spacers in any situation. Remember that using a thick or thin gear set has no side effects and will be just as strong and hold up just as well as a gear set that is the factory thickness. The chart below illustrate the break points and deck height parameters of many of the most popular carrier/differentials.
Tales From The Tech Line: Gear Tooth Grinding
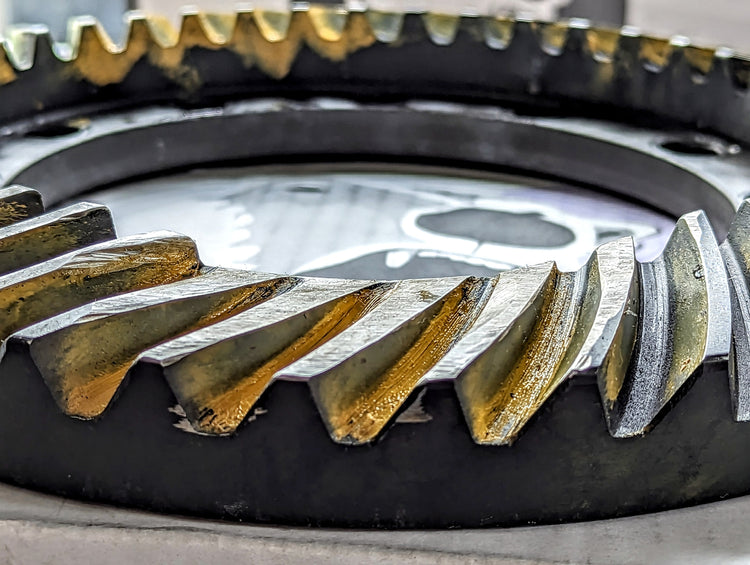
This edition of Tales From The Tech Line illustrates what happens when someone sets their grinder to overkill. The fiasco starts with a Toyota Land Cruiser moving up to a 4.56:1 gear that requires a little extra installation effort. That’s right your TLC will need some TLC if you plan to run a 4.56 or deeper gear set. The catch? The Land Cruiser diff sports semi float axles that use C-clips which makes removing the cross-pin problematic as there is an interference issue. In this case, minor clearancing of gear teeth is needed in order to remove the cross-pin and facilitate the gear swap. Gear grinding is not an unheard-of occurrence. There are right and wrong ways to do this. Under the banner of ‘Wrong Way’ we present this TLC diff that happened to be upgraded with a Yukon Grizzly Locker. It should be noted that the locker played no role in the clearance issue. This is a strictly ring gear meets cross-pin affair. A total of eight teeth had material removed, four of them had roughly half the tooth cut away, the carnage protruding well into the contact pattern. Above you can see a very significant amount of grinding was done, all the way to the root of the teeth. This overkill results in severely compromised ring-gear-to-pinion contact on an extended area of the gear dooming the ring gear to a high probability of failure even under light load. Above you can see a new gear set installed on the carrier, and light contact being made on just the tips of two teeth. The right way to do this is to removed as little material as possible, just enough to get the cross-pin out. Note the small area of contact marked with a paint pen prior to grinding. This keeps the procedure manageable. Grinding was easily executed in less than five minutes with a Dremel and a sanding roll. The amount of material removed was an area about the size of a typical pencil eraser and a smaller amount primarily on the top face on one tooth and knocking the corner off the second tooth. Viewed from the end, you can see how little material was removed. Note all grinding should be done with the gear on your workbench, not installed in the housing where shards can contaminate the gears. The minor clearance required was completely outside the tooth contact pattern and resulted in no loss of gear strength. Shop Ring And Pinion Gear Sets

Dodge, Ford, Jeep Death Wobble Explained
You’ve just picked up a load of landscape gravel. As you make your way home on the highway your Ram 2500 is approaching a railroad crossing on a gently sweeping curve. The planets have just aligned and you are about to experience Death Wobble. The condition of your tires, suspension, and steering have also aligned, producing the perfect blend of sloppiness to induce this dreaded malady. Then it happens. Immediately after encountering the railroad tracks your steering wheel becomes a convulsing nightmare and the stick shift shudders wildly as the entire front of the truck shakes with evil intent. You slow down safely, changing the resonant frequency of the events, and the trembling ceases. Death Wobble is not a good place to be. It not only challenges your control of the vehicle, it damages tires and suspension components. To be fully up-front, Death Wobble can be an issue in any truck with a solid front axle setup. Surf the internet and Jeep Wranglers and Dodge Ram pickups are the leading wobblers, but big Fords feel the effects too. Jeep Wranglers from YJ to JK and Cherokee XJ and beyond are susceptible. On the pickup side, the condition seems to be an inherent issue in first- and second-generation 2500 and 3500 Rams produced from 1994 to 2008 while the Blue Oval crew is mostly concerned about 2005 to 2019 F250s and F350s. Anatomy Of A Solid-Axle Steering System The accompanying diagram will help you better understand where the steering components we will be talking about are located. The schematic is a 1994 to 2008 Dodge Ram pickup setup. Short of the placement of the steering stabilizer and shape of the track bar it is representative of any solid-axle design. What Causes Death Wobble This phenomenon is a convergence of worn components that sparks a chain reaction that leads to Death Wobble. There can be one worn part that causes it or a combination of parts at different stages of wear. With so many contributing factors, nailing down the root cause of Death Wobble can be difficult. Solid axle designs move the front wheels in tandem where in an independent setup the motion is more isolated between the wheels. Something as inane as the aforementioned railroad crossing, an expansion joint of a bridge, even a healthy pot-hole can lead to that first domino falling. Death Wobble often happens when the vehicle is travelling at highway speeds and some manner of steering input being applied. The transfer of motion in solid axle trucks from impacting a road irregularity creates a positive feedback loop that results in Death Wobble. Beyond vehicle control issues, the shaking can damage tires, the sector shaft in steering boxes, tie rods, bushings, wheel bearings, and it often hammers the ball joints. Poorly installed or low-quality lift kits can be a harbinger of Death Wobble. They wreak havoc with steering angles which amplifies the effects of wear on key Death Wobble culprits in the steering system. Big tire upgrades put additional stress on steering system bushings and joints. How you’re using your rig can also change the conditions that lead to Death Wobble. Hauling or towing can also swing the pendulum in favor of Death Wobble because the added cargo load or heaviness of the trailer transfers weight to the rear of the truck, unloading the front suspension. The light front end is more susceptible to the wobble. The Prime Suspects Death Wobble is a tough nut to crack. It can have a singular cause or be the combination of a number of worn parts reaching a critical threshold, even loose bolts in the steering system can cause the phenomenon. Compromises in the following components can set stage. The bottom line here: sloppy steering and suspension tolerances open the door to Death Wobble. Track Bar The track bar is a popular bad actor when it comes to Death Wobble. It’s the universal first part to check for Jeeps, heavy duty Ram and Ford pickups, and any solid axle truck that shows signs of the wobble. We’re taking about the track bar bushing itself as well as the bolt that secures it. The breakdown of the bushing can lead to movement, altered steering angles, and vibration. In Jeeps and Rams, the bolt that attaches the upper track bar (gray arrow) can loosen and, over time, cause the hole in the mount to become oblong which leads to excessive play in the steering. Check the hole for roundness and the bolt for tightness (Jeeps require 125 ft-lbs of torque) and consider replacing the bolt for a higher-grade bolt that can be torqued more. Lifted rigs will have a relocation bracket to keep the geometry in spec. The brackets are another possible point of failure. Improper installation can cause the bracket to become an unwanted pivot point or poor quality will result in a bracket that’s prone to bending… all which will change steering geometry and invite oscillation. On the Ford side, the inner track bar bolt is heavier duty and not prone to bolt movement issues. The outer track bar tie rod ends are suspect. In 2005 to 2016 trucks Ford used a pressed-in joint. 2017-and up trucks have the tie rod end built into the track bar. Deflection is this area ranks high on the cause-and-effect list for big Blue Oval trucks. Tech Tip: To diagnose Death Wobble within the entire steering system have someone crank on the steering wheel, dry steering the system back and forth, and observe (with eyes and ears) the steering linkages and components to identify flex, deflection, and movement. Shop Adjustable Track Bars Ball Joints Ailing ball joints are part of the Death Wobble puzzle. Practically doomed form the start, stock Jeep and Dodge Brothers ball joints have a nylon liner/insert that can compromise their performance. The nylon material is unable to stand up to high mileage not to mention the rigors of off-roading. In Dodge trucks the passenger side ball joints tend to show more wear. Tech Tip: The answer here is upgrading your Ram or Wrangler to heavy-duty Yukon ball joints. These ball joints are more rigid and built with superior materials to handle whatever you throw at them. Ball joints are not as big a wear item on Fords because their design is better. They can come into play when addressing alignment as the joint rides in the caster shims. A Ford service bulletin calls for an increase in camber and these shims are a popular topic in forums. It’s difficult to diagnose shims as the problem but adding a little caster is known to help on newer Ford trucks that are experiencing Death Wobble. Tech Tip: To evaluate ball joint wear jack up the front of the vehicle and leverage the tire with a pry bar. Pry the tire in an up-and-down motion. If the tire moves beyond expected sidewall deflection and/or if you hear/feel and mild clunk, your ball joints are likely toast. It should be noted that alignment is an overarching concern when it comes to Death Wobble. It sets a false foundation and magnifies the shortcomings of other components in the steering/suspension systems. It may be wise to check alignment as part of your Death Wobble troubleshooting regime. Shop Ball Joints Steering Linkage/Tie Rod Ends Ram owners need to know their linkage. The type of track bar/steering linkage you have will impact your rig’s tendency to wobble. As always, the situation can be compounded by the use of larger tires and suspension lifts that put more stress on the steering system. There are two linkage types: Y-Style and T-Style. In a Y-Style, fitted on second- and third-gen Ram pickups, circa 1994 to 2008, the outer tie rod bolt is parallel to the ground and the steering bar bolts to the pitman arm. The problem with this setup is how toe changes as the suspension articulates, putting additional stress on bushings and accelerating tire wear. Tech Tip: The passenger side tie rod end is a known offender. Evidence of its guilt can be seen in more tire wear on the front passenger-side tire. Note: Fords can also suffer from worn tie rod ends. T-style steering debuted in fourth-gen Ram pickups, 2009 to 2018. In this design the outer tie rod bolt is perpendicular to the ground and the pitman arm and steering bar attach via a clip (not bolted to the bar). Tech Tip: Swapping to this newer design is a great way to upgrade the system and take one Dodge/Jeep Death Wobble cause off the table. The steering linkage, namely the steering stabilizer, has been touted as a leading cause of Death Wobble for Ford Super Duty owners. In fact, a service bulletin was issued for 2017 to 2019 F250 and F350s. While the stock stabilizer is cheap and not up to the task, replacement is often a temporary fix that masks the true cause of the wobble by better absorbing that first wave of vibration. Consequently, the condition often returns after a few months. Shop Tie Rod ends Steering Box There are many different lines of thought when it comes to the cause-and-effect of Death Wobble. One of the more interesting theories on the Dodge side centers on the steering box and the role hydraulic pressure of the power steering plays in the Death Wobble drama. The worm gear in the box is hydraulically actuated via an inner spool valve and outer spool valve. When you work the steering wheel, these valves interact which opens the grooves between them. Hydraulic pressure enters via the grooves and the steering box turns the wheels by way of the torsion bar. When the vehicle encounters train tracks, pot holes, expansion joints, or whatever the system’s loose tolerances allow the spool valve to release but there is still pressure trying to open the valve and steer the vehicle… setting off a repeating loop where the hydraulics bounce between turning one way and the other which makes the steering wheel shake from side to side. As mentioned earlier, Ram owners can swap to a fourth generation (2009-2018) steering system or an aftermarket steering box setup from Redhead, Moog, or Mopar to help alleviate this problem. Tires & Shocks We’re ending this dubious list with tires and shocks because they can be both a cause and effect of Death Wobble. Tire wear characteristics and sidewall stiffness are at issue here. Irregular wear in the form of cupping on the tread blocks factor most prominently. A lack of sidewall stiffness is only a factor if it adds to the sloppiness of the suspension/steering as a whole. Cupping is a distinct low spot in the middle of a tread block. In some cases, uneven wear at the edges of the tread block can also be problematic. Pronounced, uneven tire wear plays into a ramping effect that can progress into Death Wobble. Tech Tip: One way to diagnose the impact of your tires is to swap suspect front tires to the rear of the vehicle or install new/different tires and go for a test drive. Beyond that, pay close attention to tire pressure (front from side to side), check tire balance periodically, and consider rotating tires on an accelerated schedule. Blown shocks can impact tire wear, suspension performance, and steering and should also be monitored. Shop Shocks Shop Suspension Lift Systems Wobble-Spotting This isn’t folklore. The NHTSA has issued a number of recalls addressing the matter on 2003 to 2008 Ram pickups. They include a recall of 700,000 vehicles for defective left tie rod assemblies, 242,780 vehicles for outer tie rod ball studs, and one for 1,500 trucks that have aftermarket pitman arms installed. There have also been class action lawsuits filed by vehicle owners regarding Death Wobble in 2018 to 2020 Wranglers and Gladiators and 2005 to 2019 Ford F250 and F350 Super Duty pickups. While it may seem that Death Wobble happens all of a sudden there are some clues to be mindful of. The problem is the subtlety of the progression means the tight, on-center feel that inspires confidence fades slowly. It will start with steering slop, dead spots in the steering where you get a numb feeling from the wheel. This can progress to bump steer and then it’s game-on. Once Death Wobble starts it will become more intense and easier to induce. Death Wobble is a tricky customer. It is the result of many worn parts creating the proper conditions. Part of the deception is how fixing one thing will make Death Wobble stop but what has actually happened is the threshold of where Death Wobble is initiated has been moved back. When one of the other component systems i.e. tires, shocks, ball joints, steering boxes, or track bar bushings wear further the threshold will be reached again and the shaking will return. The best practice solution is to use high-quality lift kits, install them properly, and keep a keen eye on the wear properties of all the systems listed here and maintain them religiously or replace them before the harrowing experience that is Death Wobble visits you.
How It Works: Semi Float Vs Full Float Axles
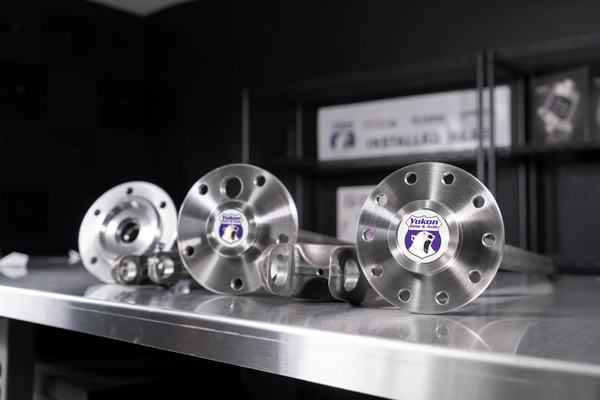
There’s a lot riding on your axles… literally. There are all kinds of variables at work here… one of the more misunderstood is axle type. There are two styles of axles used in the rear of light-duty, four-wheel-drive trucks and SUVs; semi-float and full-float. Understanding Semi-Float Axles A semi-float axle features splines on its inner end to connect with the differential carrier. It rides on an outer bearing, which supports the weight of the vehicle. In semi-float applications the wheel is bolted directly to the axle via a flange-and-wheel-stud setup. Understanding Full-Float Axles A full-float axle does not carry the load of the vehicle and does not have the wheel bolt directly to it. In this design wheel attachment is accomplished with a wheel hub. The hub is attached to a spindle that is that is amounted to the outer axle housing tube. The wheel hub is suspended via multiple tapered roller bearings. These component parts support the weight of the vehicle. Pros & Cons Size being equal, full-float axles are significantly stronger than semi-float axles. This added strength translates into higher load capacity which is advantageous when towing or during hardcore off-roading, especially on rigs with big-tire upgrades. If you go too extreme and break an axle on the trail, full-float axles can be removed while keeping the wheel attached and capable of rolling because the wheel does not rely on the axle for its ability to rotate, its wheel hub is completely independent of the axle shaft as it’s mounted to a spindle that’s fitted to the outer end of the housing.. no axle, no problem. Shop Axle Kits
Don’t Throw Away That Model 20 Rearend Yet!
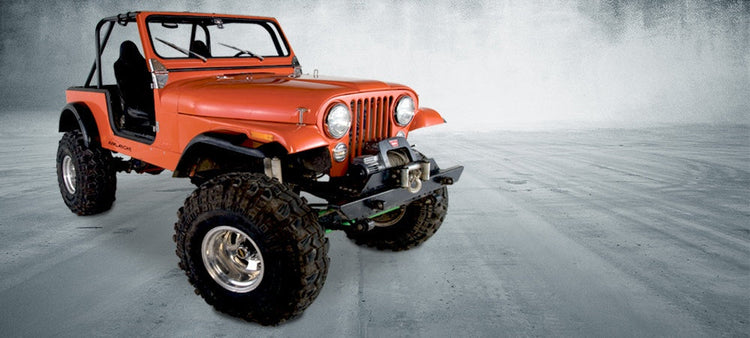
The AMC model 20 rearend has been getting a bad rap for years. The two-piece axle design that AMC used in most Model 20’s is about as sturdy as using dental floss for a tow rope. For reasons of economy or otherwise, AMC stuck with its two-piece design axle right up until the very end. There are some applications that come with the one-piece axles stock, but they are few and far between. Given these drawbacks, you are probably thinking it is time to retire that Model 20 rear end. Not so fast. The two-piece axles are a weak link that can easily be overcome. Also, the ring & pinion in a Model 20 is actually larger than a Dana 44, so this larger gear can take more abuse and holds up well with tall tires. There are many sources for high quality one-piece replacement axles that are superior to the original design. I prefer designs that use Timken SET9 axles bearings. These high quality bearings do not need to be adjusted for proper end play. They hold up very well with oversized tires, and replacements are readily available if they become damaged by rust or wear. For those of you to whom cost is no barrier, Warn Industries now makes a full float axle kit. These high quality kits use forged 29 spline axles and include all of the hardware to make you M20 a full float rear end. As far as axle strength goes, the M20 axles are 29 spline and are virtually as strong as the 30 spline D44 axles. I have seen axles break in both rearends, so neither is completely indestructible. However, both are relatively strong and hold up well to all but the severest conditions. Upgrading to stronger axles is only the beginning of a strong rear end. I also recommend a good positraction or locker and the right gear ratio. You may say, “I told you this diff is a loser,” but any other design will also need a good traction differential and the right ratio. For occasional off-road use, the stock Trac-Lok limited slip may work, but I seldom recommend it due to its wimpy clutch design. Auburn Gear now makes a strong, aggressive limited slip that works well off-road and drives fairly smoothly on pavement. At one time, AMC used Powr-Loks in some passenger car applications. If they can still be found in wrecking yards, these work great for off road. There are also several locker available: Lock-Rights, EZ Lockers, ARB Lockers, and of course, the Detroit Locker. I personally like the strength and ease of use of the Detroit Locker. However, the ARB Airlocker is smoother for street driving, and the Lock-Right and EZ Lockers are easier to install. Don’t Throw Away That Model 20 Rearend YetWhen it comes to gears, the Model 20 ring & pinion gears are larger that those of the Dana 44. The D44 is ring gear 8.5″ in diameter and the M20 is 8.875″ in diameter. The pinion shaft on the M20 is also much larger and supports the pinion teeth very well under heavy loads. The only drawback of the M20 ring & pinion is the lack of numerically high ratios available. To my knowledge, 4.56 is the lowest (highest numerically) ratio available. A complete list of ratios that are available includes: 2.73, 3.07, 3.31, 3.54, 3.73, 4.10, and 4.56. So, yes, there are some shortcomings when using the Model 20 rearend. Nevertheless, when all is considered, I still believe that the Model 20 is a good choice in most situations, and the bad reputation earned by its weak axles is not reason enough to pitch the entire rear end.


