randys blog

NEW: 2005-2023 Toyota Tacoma Heavy Duty Tie Rods
NEW PRODUCT These ICON Heavy Duty Tie Rods boast considerable strength benefits compared to the 2005-23 Tacoma's stock tie rods. The inner tie rod and ball stud is CNC machined from 4140 chromoly with metal-on-metal bearing surfaces for durability that far exceeds the plastic inner races of the factory components. The adjustment threads are also beefier. The outer tie rod is forged steel and houses a beefy, metal-on-metal tie rod end that is greaseable for extended service life. These tie rods are designed for fitment around factory wheel offsets and include inner tie rod boots to protect the steering rack from dirt and debris. 55157 05-23 TACOMA HD TIE ROD KIT KEY FEATURES: 4140 chromoly inner ball studs Forged steel outer tie rod ends Metal on metal ball joint design with grease zerks Metal-on-metal inner tie rod Design for optimal clearance of factory wheel offset Includes inner tie rod boots that protect the steering rack from dirt and debris Limited lifetime warranty DOWNLOAD PRICING & SPECS DOWNLOAD PRODUCT IMAGES DOWNLOAD INSTRUCTIONS SPREAD THE WORD! Use the attached Product Info, Images, and Tech Notes to add these items to your WEBSITE Use the attached images and info to announce this New Product through your SOCIAL MEDIA channels Forward this email to your SALES STAFF and use the included Product Info and Tech Notes for Sales Training Call us if you have any questions.
New ICON Products: '21-'23 RAM TRX Billet UCAs with Delta Joint Pro & Rear 2.5 Hydraulic Bumpstop Kit
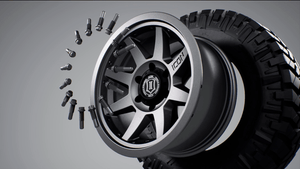
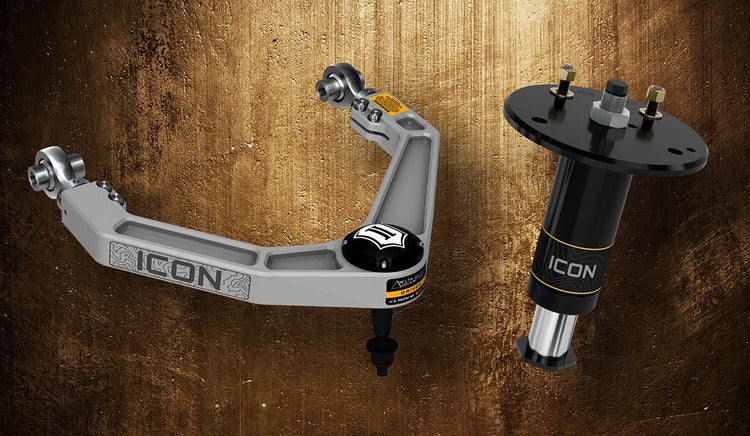
The RAM TRX is an amazing machine with highly capable suspension and drivetrain systems right from the factory, but ICON has identified a couple of areas where the vaunted TRX can benefit from improvement. ICON Billet Upper Control Arms provide on-vehicle adjustability to dial-in alignment for any lift or suspension modifications, along with the high-angle, serviceable, and rebuildable, patented Delta Joint Pro. And our Rear Hydraulic Bumpstop Kit helps smooth suspension bottoming under hard use. Together these components help TRX owners squeeze even more performance out of an already awesome truck! 21-23 RAM TRX BILLET UCA 218561DJ 21-23 RAM TRX BILLET UCA DJ PRO KIT KEY FEATURES: CNC machined 6061 billet aluminum construction with satin anodized finish Added degree of caster from stock uca Quick, precise, on-vehicle adjustment for both caster and camber Delta Joint PRO allows maximum articulation without binding Delta Joint PRO is 100% serviceable and rebuildable FK Rod Ends at chassis pivots for strength and precision driving characteristics Built in O-ring sealed dust cover cap TECH INFO: Fits RAM TRX only (does not fit other RAM models) SHOP NOW 21-23 RAM HYDRAULIC BUMPSTOP KIT 211020 21-23 RAM TRX REAR 2.5" BUMP STOP KIT 2.25" TRAVEL KEY FEATURES: 100% bolt-on 2.5 diameter bump stop design 2.5" impact-extruded body hard anodized Heavy duty 1.625" shaft replaceable noise-reducing striker pad IFP design 6061 billet aluminum components Velocity-sensitive technology exponentially increases bottom-out resistance Vehicle-specific bump stop tune provides smooth engagement and excellent ride quality TECH INFO: Fits RAM TRX only (does not fit other RAM models) Call us for more info: 1-800-347-1188
New ICON Products: IVD Leveling Kits for 2023 GMC Canyon & Chevy Colorado Pickups
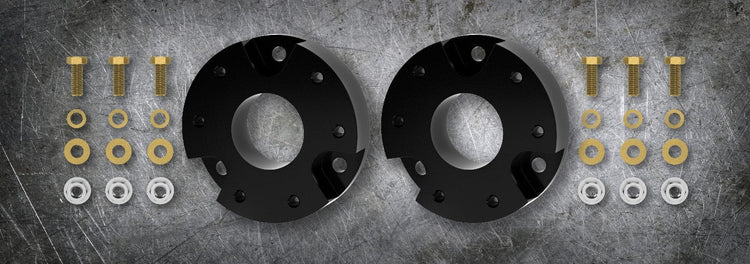
The ICON 2" Lift Front Coilover Spacer Kits for 2023 Canyon & Colorado are designed to provide lift while ensuring that there is no ball joint over-extension or bind that can cause damage to ball joints. CNC machined 6061 billet aluminum construction and a black anodized finish mean this product can stand up to the test of time in the harshest on and off-road conditions. Backed by ICON’s limited lifetime warranty, the ICON Vehicle Dynamics 2" Lift Front Coilover Spacer Kit is the best leveling solution on the market for the 2023 Canyon or Colorado. IVD1216 23-24 GM CANYON/COLORADO 2" FRONT SPACER KIT IVD1215 23-24 CHEVROLET COLORADO 2" FRONT SPACER KIT KEY FEATURES: Increased ride height over stock (2” lift front) Increased ground clearance Vehicle specific design Designed to prevent ball joint over-extension or bind CNC machined 6061 aluminum components. Black anodized finish for excellent corrosion resistance TECH INFO 158 IVD1216 ONLY FITS "ULTRA WIDE STANCE" VEHICLES 160 IVD1215 WILL NOT FIT GMC CANYON. WILL NOT FIT CHEVROLET COLORADO TRAIL BOSS OR ZR2. CALL FOR MORE INFO: 1-800-347-1188
How It Works: Positraction Limited Slip Differentials
Positraction or Limited Slip Differential Limited Slip Differentials (LSD) significantly increase the traction and performance of Jeeps, trucks, 4×4s, and RWD vehicles on the street, at the strip, or on the trail. Positraction is what General Motors called its limited slip differential, the term has come to refer to LSDs in general. How Do Limited Slip Differentials Work? An LSD’s main job is directing torque where it’s needed. When you’re driving in a normal manner a positraction limited slip differential is pre-loaded and provides equal traction to both wheels. Mashing the throttle, taking a tight corner aggressively, or working through loose gravel trails will result in the limited slip differential limiting wheel spin across the drive axle by permitting the axle shafts to spin at different speeds while continuously trying to balance the application of torque between the two axles. This results in transferring more power to the wheel with the best traction which enhances the grip, control, and the predictability of the vehicle. Are There Different Kinds of Limited Slip Differentials? Yes. In their static state, when traveling in a straight line where wheel speeds are identical on both sides, all limited slip differentials provide equal traction to both tires. The difference between LSD types is how each unit applies torque when additional traction is needed. Clutch-Type Limited Slip Differential In regular circumstances a clutch-typeunit, like the Yukon Dura Grip, uses an array of springs to apply pressure to the side gears which puts pressure on the clutch packs in the outer part of the carrier. Both axles get equal pressure and both tires get equal traction. When a tire starts slipping, the clutch packs are engaged with differing resistance. The clutches compensate to maximize traction between the tires, transferring more torque to the tire that has the best grip while reducing torque transfer to the tire that has less grip. All Dura Grip units are four-spring designs built with a high-strength nodular iron case, forged 4320 chromoly spider gears, and high-quality composite clutches. The Dura Grip positraction limited slip differential is engineered for long life and is completely rebuildable. The clutches can be replaced to bring the unit back to its original performance level, or different clutches and spring rates can be used to fine tune the Dura Grip’s performance to better match the style of driving/racing you are doing. The Yukon Dura Grip is transparent in its traction enhancement, coming online only when the edge of adhesion is reached and slippage occurs. This makes it ideal for daily drivers that will be driven hard on the street and see extended action on the trail or at the track. Yukon Dura Grip Specs Four-Spring Clutch-Type LSD High-Quality Composite Clutches Tough Nodular Iron Case Forged 4320 Chromoly Gears Fits All Gear Ratios Choose from Four Levels of Spring Pressure When Rebuilding Each Unit is Quality Tested and Assembled in the U.S.A. Recommended Gear Oil: Non-Synthetic 80W-90 GL-5 1-Year Warranty Against Manufacturing Defects Gear-Type Limited Slip Differential A gear-type LSD, like the Spartan Helical LSD from USA Standard Gear, have no frictional surfaces to initiate torque transfer. It uses floating helical-cut worm gears that operate in pockets and mesh together. Under normal driving conditions this type of LSD acts like an open diff. When acceleration or wheel slippage occurs, axial and radial thrust is applied to the helical gear pinions in their pockets. Under these loads, more torque is transferred to the tire with the best traction, in a progressive manner, as torque is withheld from the tire that is slipping. The Spartan Helical LSD provides smooth engagement, quiet operation, and requires no maintenance. The unit’s 10-pinion design has a strength advantage over an equivalently sized 6-pinion or 8-pinion unit because it has more points of contact and a greater surface contact area to deliver optimal load distribution. This LSD is built tough. The Spartan Helical LSD is a fully assembled unit featuring a forged 8620 grade steel case and stout 8620 alloy internals for superior durability. Spartan Helical LSD Specs Fits Dana 30 Front Differentials 27 Spline, 3.73-And-Up Ratio Enhanced Off-Road Grip, No Compromise of On-Road Drivability Maintenance Free, No Clutches to Rebuild Low Noise, Smooth Engagement, Linear Traction Forged 8620 Grade Steel Case, 8620 Alloy Internals for Superior Durability Recommended Gear Oil: Non-Synthetic 80W-90 GL-5 Use of Friction Modifiers Not Recommended Assembled in the U.S.A. 1-Year Warranty Against Manufacturing Defects Because they give your ride that extra bit of bite, limited slip differentials are ideal for daily drivers that will be driven hard on the street and see extended action on the trail or at the track. Whether you’re facing mud, loose gravel, or steep inclines on the trail or slippery snow or rain on the road, the Spartan Helical LSD will ensure you have unrivalled traction and supreme confidence in your vehicle. Shop Limited Slip Differentials Or Call Now 866-631-0196 Spartan Helical LSD Yukon Dura Grip
How It Works: Pinion Bearing Preload
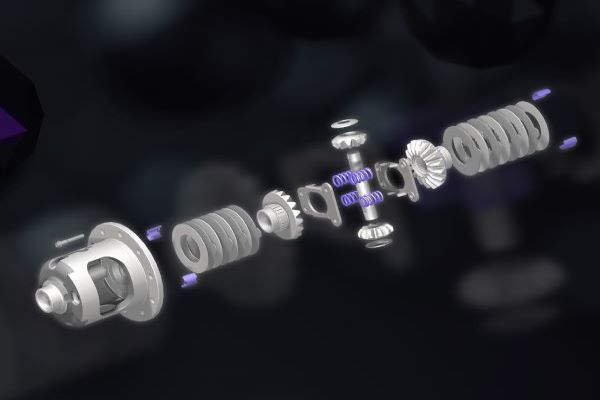
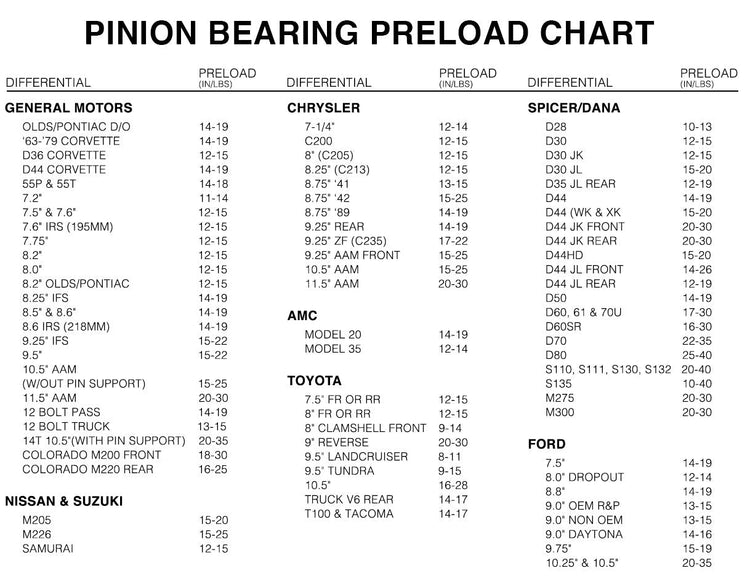
Pinion bearing preload is a critical step in the differential overhaul process because if you get too heavy handed you have to backtrack and start over. Further, getting this procedure right sets the stage for each following step of reassembly. It should be noted from the get-go that there is a difference between the minimum torque value for the pinion nut and the pinion bearing preload. The process starts by securing the nut to the pre-described minimum torque, then measuring preload and tightening in small increments as required until the target preload is attained. Pinion Installation Basics Starting with a bare pumpkin, oil the front and rear pinion bearing surfaces in the diff housing then drive the pinion races into the housing using a pinion bearing race driver until they are fully seated. Clean and apply high quality silicone to the races. TIP Treat pinion bearings and bearing races as a mated pair? If you have to change out a pinion bearing remember to install new races as well. Install pre-oiled front pinion bearing and pinion seal. Follow that up with installing the pinion gear and crush sleeve. Next, install pinion the yolk onto pinion splines making sure not to damage the pinion seal when tapping the yoke into place. Finally, apply oil to the pinion nut washer or thrust surface of the pinion itself, put some thread locking compound on pinion threads or threads of the pinion nut, and hand start the nut. Torque Value Versus Preload Tighten the nut until you can feel resistance when turning the yoke back and forth, check torque load. Typical starting points are 55 lb-ft for 3/8-inch bolts/nuts, 75 lb-in for 7/16-inch bolt/nuts, and 125 lb-in for 1/2-inch nuts/bolts. TIP Tap the end of the pinion gear with a punch to ensure the races are fully seated, shake it to evaluate for excessive play. Once you’ve confirmed the nut is properly torqued check for preload. Using a dial-style inch-pound torque wrench spin the nut/pinion to get a running measurement of how much torque it takes to spin the pinion. We’re talking about the running friction or rotating friction of the assembly, not necessarily brake torque. Check, tighten, and check the preload as you go and continue to tighten until you reach the desired/required pinion bearing preload for new bearings as indicated on the accompanying chart. Sneak up on the proper measurement, if you over-torque the pinion nut and get too much preload you will need to replace the crush sleeve and start again. Preload Importance As mentioned earlier, this is the first step of the journey, getting off on the right foot is all the more important. Stability is the end goal of proper preload. Getting this step right prevents the ring and pinion gear from moving in a vertical, horizontal, or diagonal manner. Going too far out of spec will entice gear movement under load when accelerating or in release of load under deceleration, resulting in the reduction of backlash, which causes undue wear, binding, obtrusive noise, and/or driveline vibrations. Shop Gear Set & Install Kits
Subscribe To Our Newsletter
Sign up & unlock 5% off. Get news on insider deals, product releases, and expert advice.